Zoom (teleconferencing)
Zoom is UCLA's video and audio conferencing solution. Zoom offers many features including voice and video conferencing, screen sharing, co-annotation, and the ability for instructors who host to record and configure breakout sessions. Your Zoom account will let you host up to 300 participants.
Zoom accounts are free and set up automatically for instructors when they log into http://ucla.zoom.us/signin with their BOL UCLA login.
Important Access Note: Before you can add a Zoom meeting to a Bruin Learn site, you will need to activate your Zoom account by logging in via UCLA’s SSO. If you have never logged into Zoom before, choose the “Login with SSO” option when prompted. When asked for the SSO site URL, enter https://ucla.zoom.us and login with your UCLA SHIB account. Note that Zoom requires a software download—an option that is provided when you first attempt to create or join a meeting.
You may also download it here: https://zoom.us/download#client_4meeting
Adjusting Key Settings
There are a number of settings available in Zoom that can be adjusted according to your needs. Once you’ve logged into Zoom, go to https://ucla.zoom.us/profile/setting. Some of these include:
Chat: By default, participants are not allowed to save the chat text. This can be enabled.
Co-Host: By default, the Co-Host is enabled.This can be disabled.
Screen Sharing: By default, only the Host can screen share. If you would like to enable this for your class, you may do so. Note: There is another permission that appears if you enable this—Who can start sharing when someone else is sharing?. There are two options to chose from, Host Only or All Participants.
Waiting Room: By default, waiting rooms are turned on. This can be disabled.
Adding a Meeting to a Bruin Learn page
To add a Zoom meeting to a Bruin Learn page, click on “Zoom” on your course site’s left hand navigation panel. From the settings screen you can:
From within the Zoom interface, click on "Schedule a New Meeting" and enter the meeting details, date, time, and duration of your class session.
Select your Zoom meeting settings, which include:
Enable join before host.
Mute participants upon entry.
If you will be recording your class meeting, we recommend that you set the recording to be stored in the cloud.
When finished, scroll to the bottom of the Zoom interface and click "Save".
Your meeting should show up in the Bruin Learn course calendar.
Hosting your Meeting
To launch your meeting, simply click on the meeting you created, then click “Start Meeting” (if you enabled participants to be able to join before host, you may need to click on “Join meeting” as the meeting may have already begun). A new window will pop up, prompting you to start the Zoom software, or to download it, if you have not already done so. Click the “Launch Application” button to begin the session.
Note: The “basic” Zoom license has a 40-minute limit for meetings with more than two participants (can host up to 300). There is no limit for the Zoom pro license.
In-meeting Functions
Once you launch your meeting, a new meeting window will pop up. The main meeting window displays 1.) the current video feed of whoever is speaking, or 2.) the computer screen of the active participant (if Screen Share is enabled). Options along the bottom toolbar allow you to:
Mute: mute your own or (if you are the host) participants’ audio feed
Start Video: enable/disable your video output
Security:
Lock Meeting: prevents other participants from joining the meeting
Enable Waiting Room: places participants trying to join the meeting in a holding space for host/co-hosts to approve/reject
Allow Participants to:
Share Screen: see “Share Screen” below
Chat: see “Chat” below
Rename Themselves: participants can change how their names appear in the meeting
Remove Participant: provides list of participants to remove from the meeting (note that co-hosts cannot be removed)
Manage Participants: opens a pop-up window listing all participants. From here, you can mute participants, disable video, prevent other participants from sharing their screens, and lock the meeting so no new participants can enter.
Share Screen: allows you to either share your full desktop, or only specific windows
Shared Screen Features: Once you have shared your screen you can annotate the screen using the “Mouse”, “Draw”, “Spotlight”, and “Clear” functions.
The host can choose to disable participant annotations if desired (this option can be found under the “More” drop down box)
You can also share any iPhone/iPad using iOS mirroring
Chat: allows you to text chat with either specific participants or with the entire group in a separate window
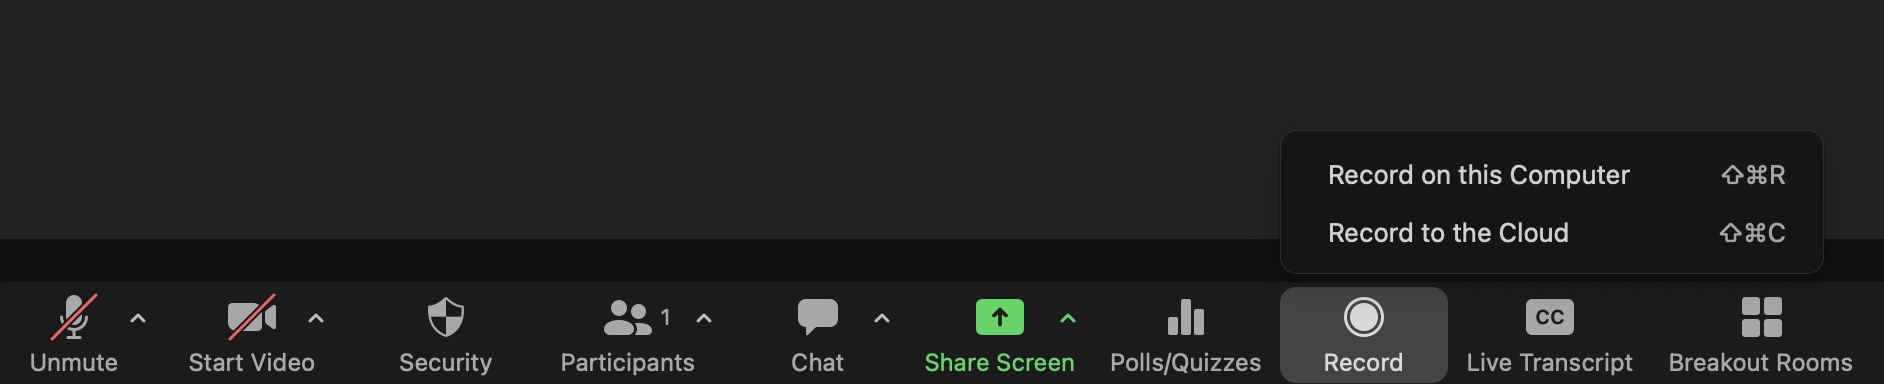
Record: enables/disables the ability to record the meeting (this can be set in your account).
Zoom recordings can be saved to your computer or to the cloud. Recordings can be uploaded to Bruin Learn sites regardless of where the recording is stored (your computer or the cloud), though the cloud option offers a simpler workflow. See below for instructions on how to upload recordings to your course site.
Share: share any content, including video clips with audio
Breakout Rooms: activate video breakout rooms for small groups (useful for assigning collaborative exercises to students)
Reactions: allows participants to “clap” or “give a thumbs up” via emoji, which appears in their designated window
Zoom as an Instructional Tool
Instructional purposes. Some of these include:
Weekly recurring virtual office hours
Lecture recording
Project collaboration
Recording review sessions
Recording live oral exams/quizzes for language courses
Group editing/peer review of documents using screen share
Virtual Backgrounds
Zoom has the ability to put you into a virtual background which can make your meeting more interesting, provide some cultural or content related to your subject, or to hide your real background. This option must first be enabled within Zoom settings and then can be found under the menu that appears when you click on the arrow to the right of the “Start video” button.
We’ve even put together a few based on UCLA and Los Angeles that you are free to use.
How to Hold Online Virtual Office Hours
Zoom is an easy way to hold weekly office hours online. This can be done simply by enabling the meeting to recur on multiple occasions. First, you have to add a Zoom Meeting on your Bruin Learn page (see above). On the set up page for Zoom, you must check off the “Recurring” option.
If you wish to ensure that office hours are held one-on-one between you and a student, Waiting Rooms are enabled on your Zoom account by default. If you have turned it off, you can re-enable it by going to https://ucla.zoom.us and logging in as usual. Launch Zoom to start the application. In the upper corner of your Zoom screen you will see a small black gear icon labeled Settings. Click on the Settings icon, then scroll down until you see the option Waiting Room. Switch it to on if need be; it should change from gray to blue.
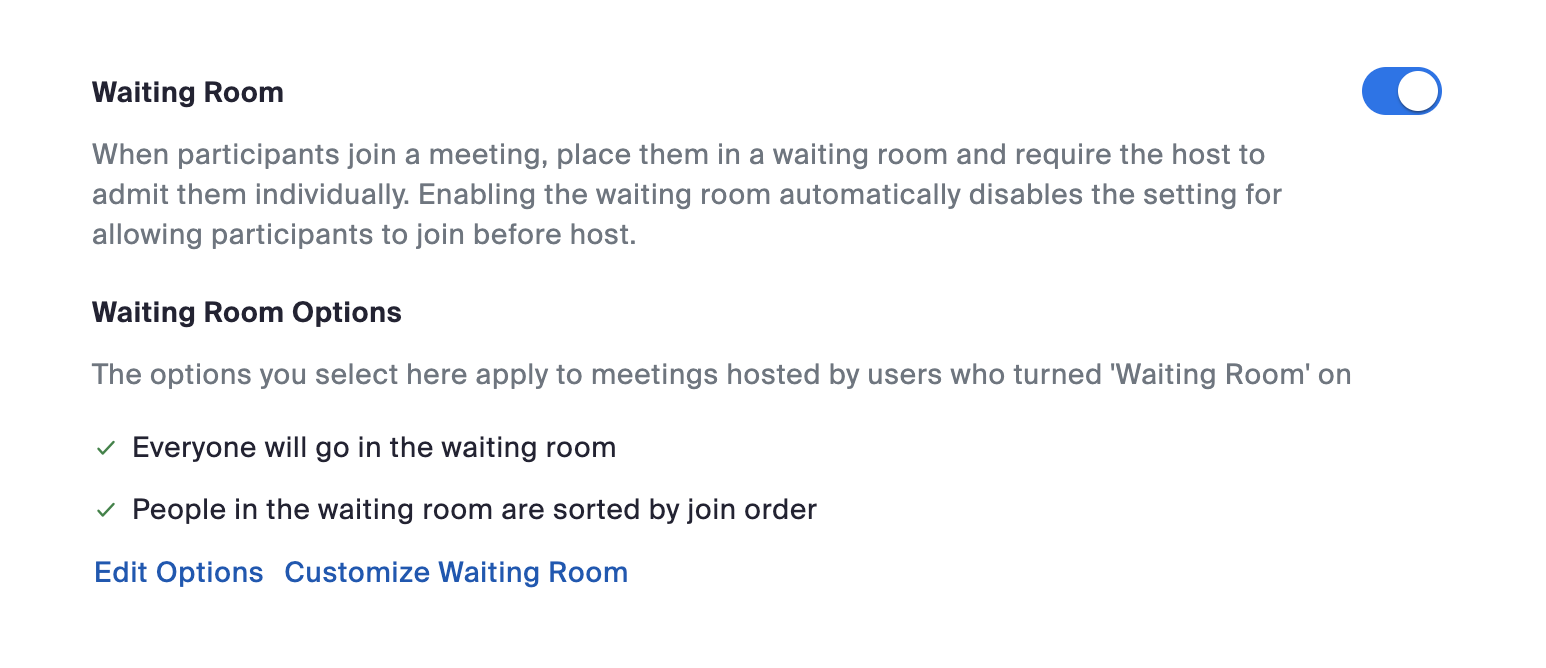
Choose from other options by clicking “Edit options.”

Zoom Outside of Bruin Learn
You can also use Zoom outside of Bruin Learn. Simply go to https://ucla.zoom.us, login as usual, and start your Zoom application. A window will prompt you to start a meeting, schedule a meeting for a future date, or join a meeting already in progress. You can invite participants from within the application, either by email, by IM, or by sending them your Zoom Meeting ID number, which they can input into their own Zoom application and join on their end.
Uploading Zoom recordings to Bruin Learn page
Zoom sessions can be set to be recorded automatically when you are scheduling the meeting, or you can manually start the recording while in the session. To have your meeting be recorded and be sent to your Media Library automatically, select “Record the meeting automatically” in your meeting settings, and ensure “in the cloud” is selected. Also, be sure to disable “join before host” to prevent recording students who join the meeting before the host arrives.
To manually begin your session recording, select “record” once in your session and then select “record to the cloud”.
Once your recording has finished, it will be processed in Zoom’s cloud. Once it has finished processing on Zoom’s cloud it will be imported in to your Media Library in your Canvas course. Because the length of this process is determined by the duration of your recording and the processing time for both Zoom and Kaltura, there may be a delay of up to a few hours between your recording ending and it being available in your Media Library.
Once it has been imported you will see your session in your Media Library section of your Canvas course. The recording name will be the name given to your Zoom session when it was scheduled and some additional details about the meeting recording will be given in the video description.