Basic Video Editing – Mac
Below are instructions for performing basic edits in iMovie.
Instructions
Open iMovie and create a new project
Import your video content.
Drag your video to the project timeline.
Once you have your video in the timeline, you can start making some edits. Here are a few common editing tools you might find useful:
Splitting clip. This allows you to divide video into smaller sections to edit individually. This is useful if you want to delete sections from your video, or incorporate another clip in between the existing clip.
To split a clip, highlight on the timeline a section you want to split, then press “Command + B”. Or in the menu, click “Modify” then “Split Clip”.
A section of video can be deleted if you highlight the clip by clicking it, then press “delete” on your keyboard.
Trimming clips allows you to make a clip shorter or longer.
To trim a clip, simply hover your mouse near the edge of a clip and drag the edge toward the center of the clip to make it shorter, or away from the center of the clip to make it longer.
Adjusting audio volume.
Hover your mouse over the small, blue section of the video clip. Click and drag the horizontal line up and down to adjust the volume on the clip.
Adding titles and transitions
Near the top of the screen, click on either “Titles” or “Transitions”. Drag the template you want to use to where you want the title or transition to happen.
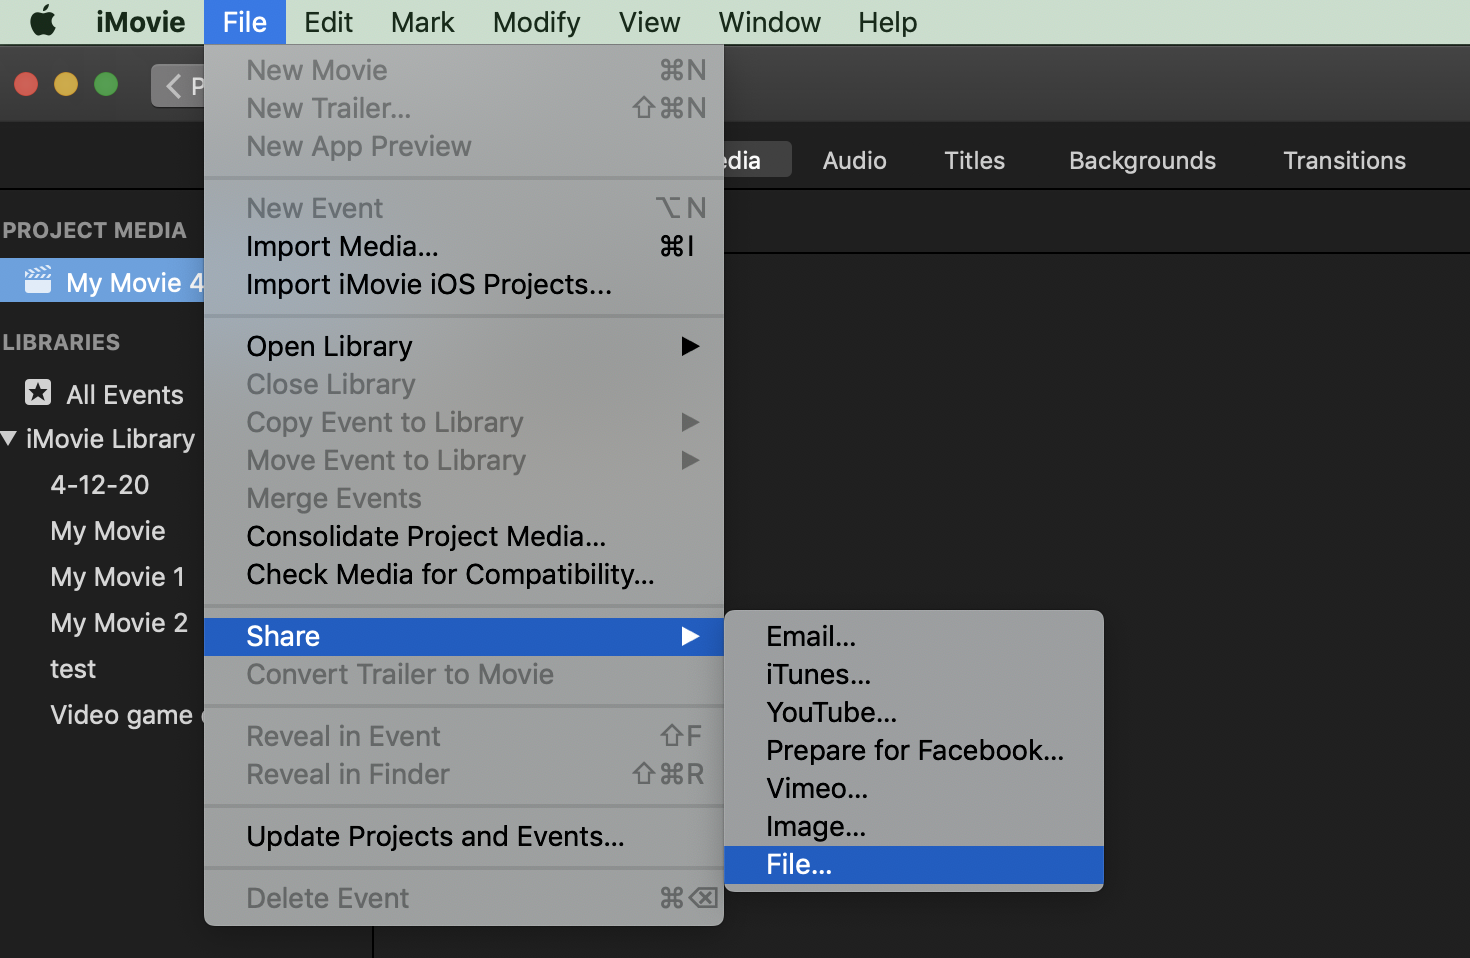
To export your project as a video file, click “File” > “Share” > “File..”